The only difference between OK YouTube videos and Awesome YouTube videos is the lighting. So, with this best three-point lighting setup for Youtube tutorial, you will learn how to set up the lighting for your next online video like a pro!
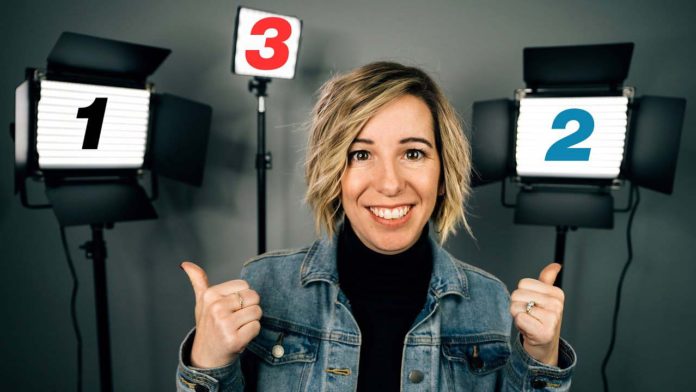
Lighting is about getting your video to look like your viewer is sitting in the studio with you. And to get the best lighting set up you need to use a simple 3 light rig.
As mentioned, lighting is the most important part of your video. Without it, you are just not going to get the response or effect of your video no matter what it is. 3-Point lighting is used in movies and film sets all over the world. These 3 lights give you the best lighting and control of your lighting on your set whether it be a film set or your home office.
If you are a beginner and want to get an idea of the basics of lighting first, here is another post that might help you learning YouTube lighting for beginners:
Key Light
This is your main light source. In the video, the key light is on the right side of the subject’s face but it does not matter if it is on the right or left side. As you can see from the video, with just the key light on, you can see the parts of her face the key light, lights up. As you can see the background and sides of the image are not lit up properly.
Fill Light
The fill light is used to get rid of the shadows on your video frame. As you can see without the fill light there are shadows in the frame that we need to get rid of. With the fill-light turned on you immediately see the difference. There are no shadows on her face as well as in the immediate background. You will see that we set the fill light up on the opposite side of the key light. This is the standard way of setting up these lights.
Pro-Tip
Remember that shadows help you shape your subject, so do try to flood the frame with too much light as this will cause issues in post-production. Your fill light should not be as bright as your key light. Either use a softbox or move the light away from your subject to get the right mix of lighting.
Back Light
The main use of the backlight is to create separation between your subject and the background of your frame. You will see the subject fade into the background if you do not have the backlight switched on. When you switch it on, you immediately see the difference a backlight makes. Your subject will pop out of the frame. Plus, you have a clear view with great light separation for your video.
Pro-Tip
Motivated Lighting – your light sources are not in the frame, so when you have the lights on and you’re filming the viewer will not know where the light is coming from. Using a Motivated Light in the background will give your viewer a light source to associate with the backlight and this will make your video jump off the screen. This is a technique that many top-level directors use in their cinematic shots. With this Best Three-Point Lighting Setup for Youtube you should be all set to create stunning videos for your channel.
