How To Apply Audio Effects With The Audio Track Mixer In Premiere Pro
- Open the ‘Audio Track Mixer’ Panel under ‘Window – Audio Track Mixer’.
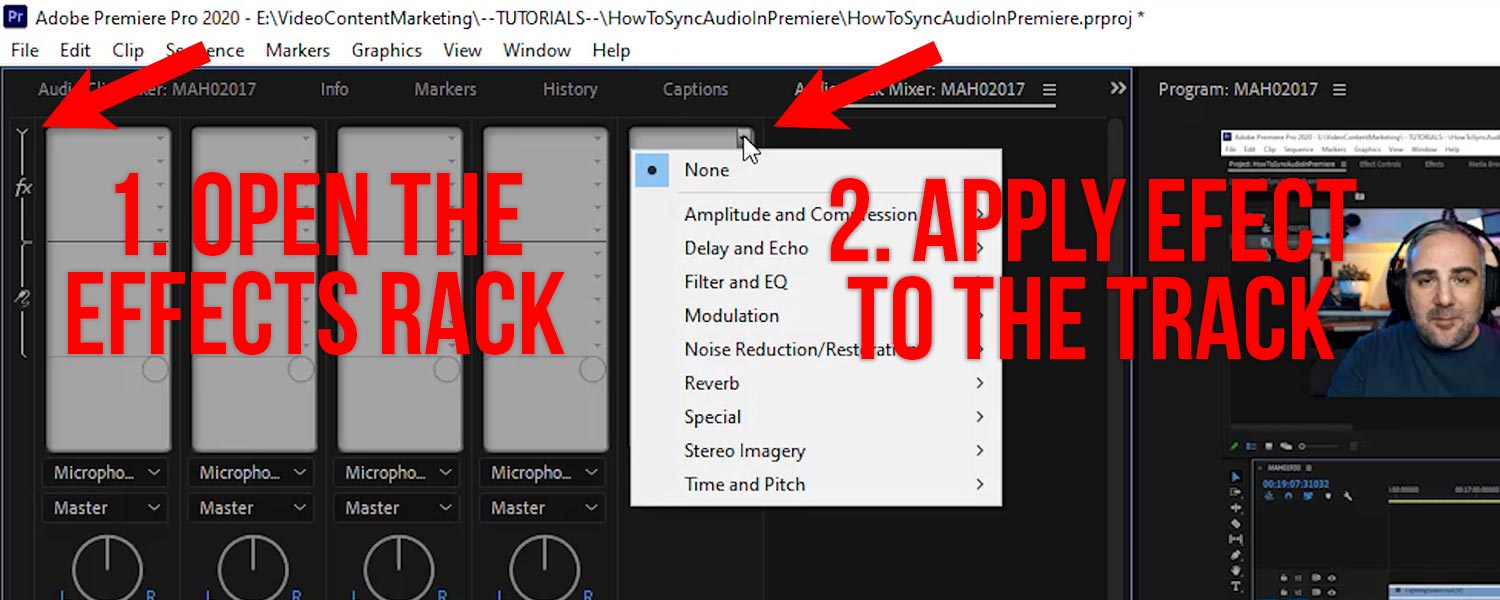
- Open the effects rack with the little triangle on the top left.
- In each slot you can open the effects menu with the little triangle on the right side of the slot.
- Apply audio effect to the desired track (Master Track is all the way on the right)
- You can stack up to 5 effects in this audio effects rack.
- Hit play on your timeline to hear the result.
When working with Premiere Pro you have probably used the Adjustment Layer already to apply effects across multiple effects. It’s a convenient way to do the work once and extend it across a whole segment or even an entire track. But how do we get the same functionality for audio effects?

Like an ‘Audio Adjustment Layer’, but different
That’s where the ‘Audio Track Mixer‘ comes in. There’s a couple of things you can do with the ‘Audio Track Mixer‘ but the best thing about it is, you can apply effects to the entire audio track or even the master track!
For that just go to ‘Window’ and select ‘Audio Track Mixer‘. When opening the first time you will probably not see the effects stack right away so let’s do that now. Just go to that tiny little triangle in the top right corner and twirl that open.
You might also like: How To Sync Audio In Premiere Pro
Now you will be presented with the effects stack where you can stack up to 5 audio effects. In each slot, you can apply an audio effect, just like any audio effect in the ‘Effects Panel‘ by clicking the little triangle on the right-hand side.
You can even apply effects to the master track, which is really handy to add a final finish to your audio. For Instance, I usually apply a ‘Hard Limiter‘ here to avoid audio clipping as shown in the tutorial above.
So, if you ever have been wondering how you’d get the same behavior as the ‘Adjustment Layer‘ but only for audio, this is how you would do it.
